

Wiring A Three Way Light Switch - Are you tired of having to walk all the way across the room to turn off a light? Installing a three-way light switch can be the solution to this problem. With a three-way switch, you can control a single light from two different locations. This may sound complicated, but it's actually quite easy to do. Below, we will provide step-by-step instructions on how to wire a three-way light switch.
How to Wire Three-Way Light Switches
Materials Needed:
- Three-way switches (2)
- Electrical wire
- Wire cutter/Stripper
- Screwdriver
To start, turn off the power to the circuit that you will be working on. You can do this by turning off the circuit breaker that controls the circuit. Next, you will need to locate the two switches that will control the light. One of the switches will be the "switch leg" and the other will be the "hot" switch.
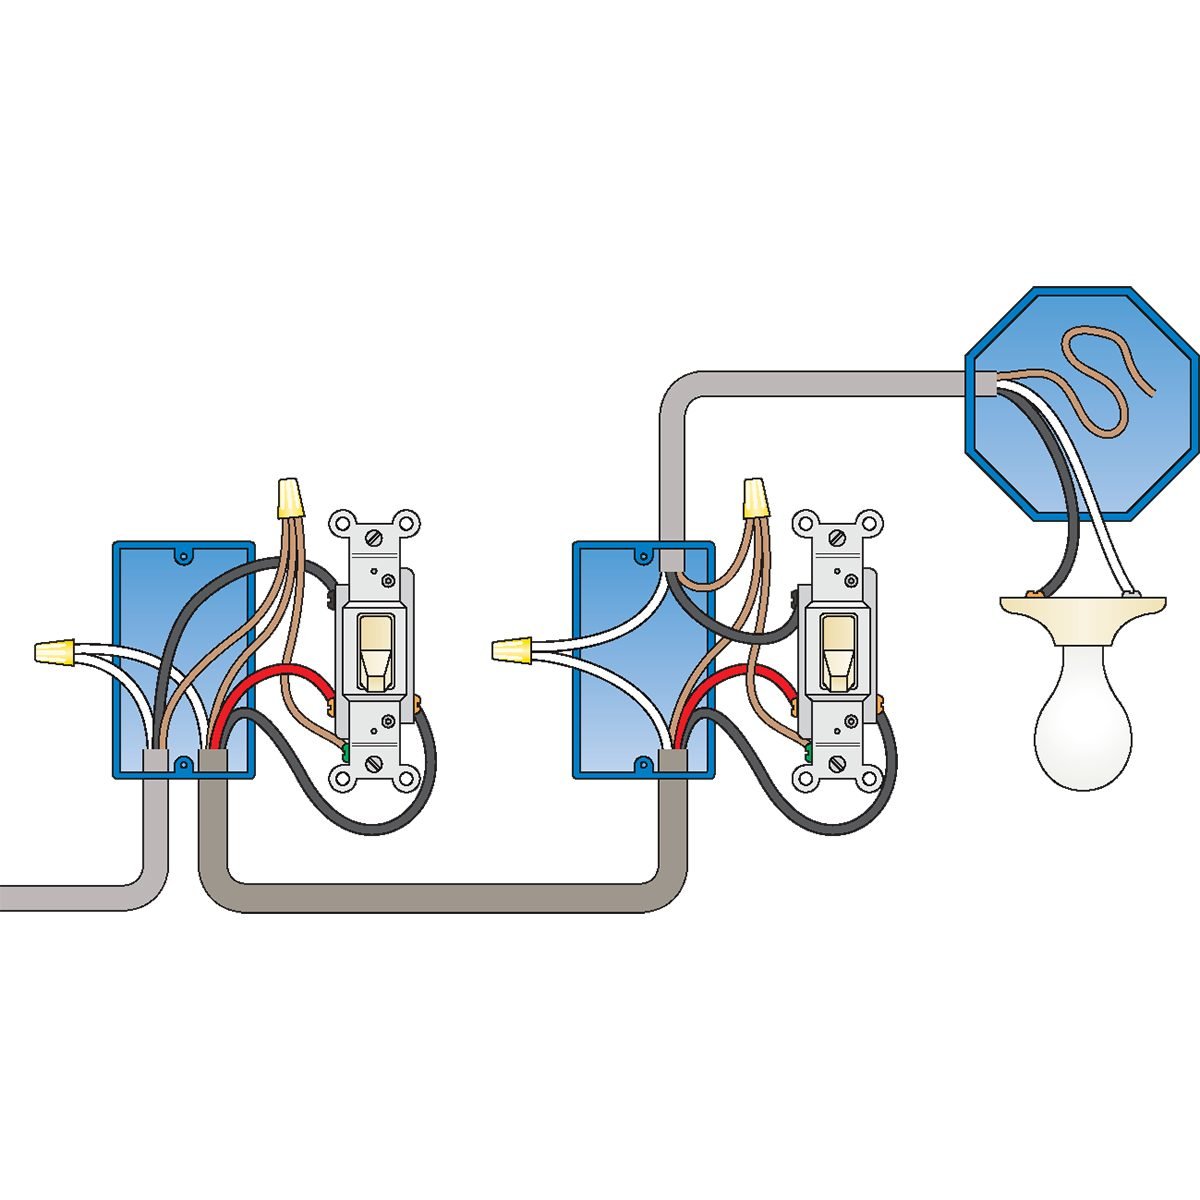
3 way switch | How to wire a light switch
Materials Needed:
- Three-way switches (2)
- Electrical wire
- Wire cutter/Stripper
- Screwdriver

Next, you will need to remove the cover plate from both switches. You should see three wires connected to each switch. The black wire on one switch is the "common" wire, while the two red wires are the "traveler" wires. On the other switch, the black wire is also the "common" wire, but the red wires are reversed. This means that one switch is wired "upside down" from the other.
How To Wire a 3-Way Light Switch (DIY) | Family Handyman
Materials Needed:
- Three-way switches (2)
- Electrical wire
- Wire cutter/Stripper
- Screwdriver
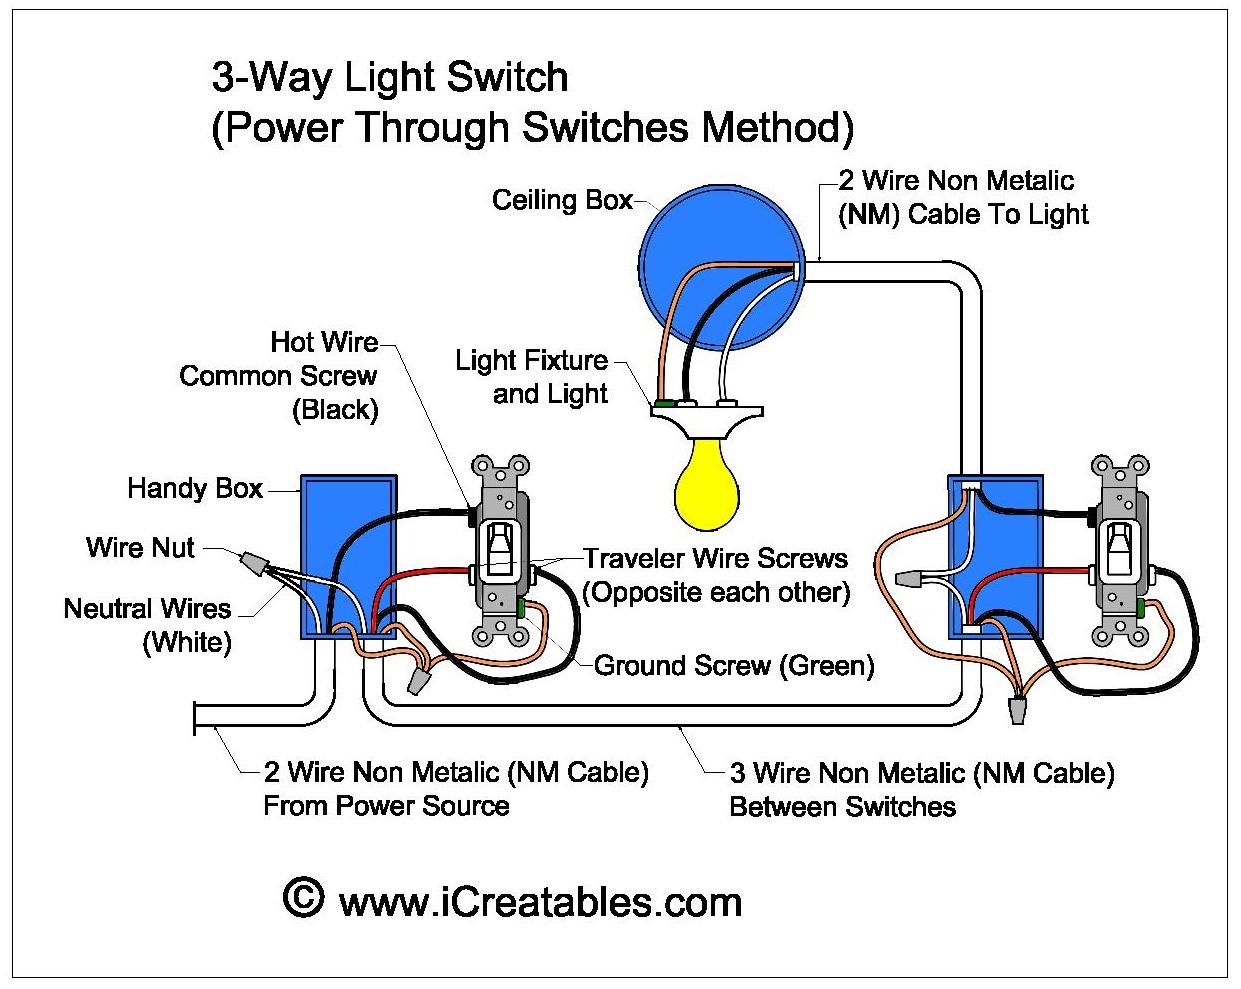
Begin by disconnecting all wires from the switches, and then connect the common wire to the common screw terminal on each switch. Then, connect one of the traveler wires to the remaining screw terminal on one switch, and connect the other traveler wire to the remaining screw terminal on the other switch. Finally, connect the ground wire to the green or bare copper screw terminal on each switch.
Three Way Light Switch Wiring Diagram - Cadician's Blog
Materials Needed:
- Three-way switches (2)
- Electrical wire
- Wire cutter/Stripper
- Screwdriver
Once all the wires are connected to the correct terminals on the switches, carefully tuck them back into the switch box and screw the switches back into place. Finally, turn the power back on and test the switches to make sure they work properly. If they do not, double check your wiring and make sure all the connections are secure.
View Wiring Diagram For 3 Way Switch With Multiple Lights Pics - Wiring
Materials Needed:
- Three-way switches (2)
- Electrical wire
- Wire cutter/Stripper
- Screwdriver
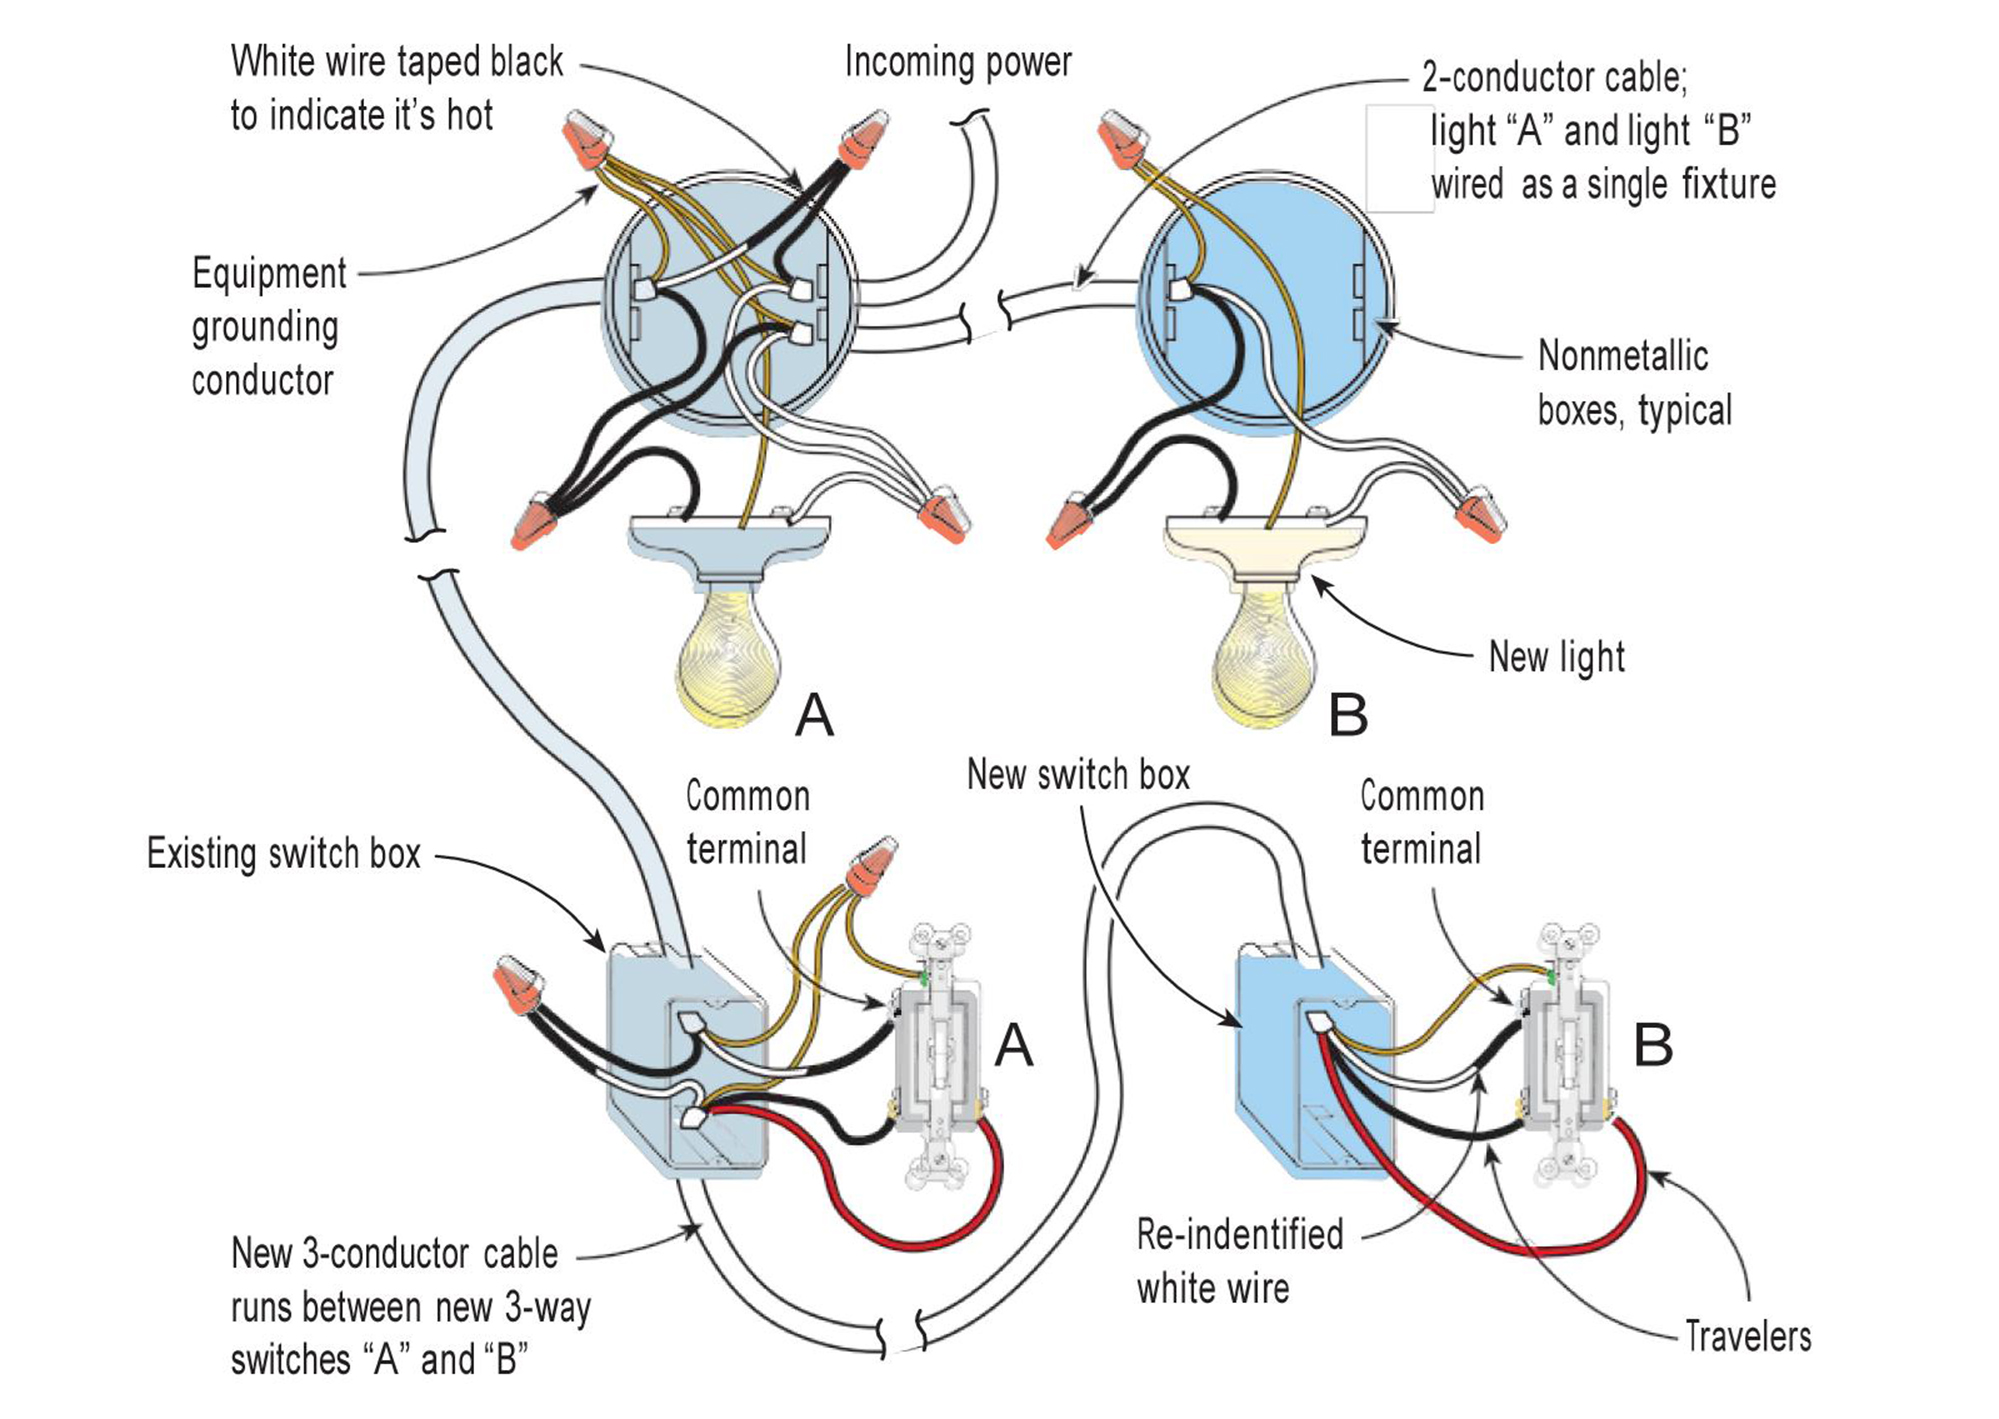
If you have multiple lights controlled by the same switches, then the process is a bit more complicated. You will need to add additional switches and wires to the circuit. However, with a little bit of patience and a good diagram, you can easily wire a three-way switch with multiple lights.
In conclusion, wiring a three-way light switch is a quick and easy process that can provide great convenience in your home. By following the steps provided above, you can successfully wire a three-way light switch and enjoy the benefits of easier lighting control. Remember, always turn off the power before beginning any electrical work and double check your connections before turning the power back on.Read more articles about Wiring A Three Way Light Switch